Showing posts with label mask materials. Show all posts

Wednesday, September 01, 2010

Positive Casting a Rabbit Mask with Celluclay

Usually I make masks by negative casting, that is, casting *inside* of a mold. But since I've been getting requests for rabbit masks faster than I can have a mold made, I've been making them by positive casting, ie, casting them *outside* of a form, in this case the original plasticene sculpture. Here's more about this method.

First, I liberally apply Vaseline to the sculpture as a release agent. Then I mix Celluclay (a kind of commerial paper mache pulp) and roll it out into approximately 1/8" thick sheets between two pieces of wax paper. These I put into the freezer for 8 minutes to make them less sticky and easier to work with, and then I peel the wax paper off and apply the sheets over my sculpture. I blend the edges of the sheets together and smooth out any major lumps, but otherwise I don't fuss too much over the texture. It's much easier to deal with after the Celluclay is dry.

The cast will need to be cut into pieces in order to remove it from the original sculpture. After I apply all the Celluclay, I make score marks along the parting lines with a clay tool. Otherwise, the Celluclay would be very difficult to cut apart when it is dry.

Then I set the mask in front of a fan to dry. Usually after an hour or two the Celluclay will start to feel leathery and I'll be able to add a little more detail back in with a wooden clay tool. After a day or two it is usually dry enough to remove from the sculpture.

Here's the beginnings of the cast, with the score lines pressed in:


Here's the cast with one of the pieces removed and the original sculpture showing underneath:


Here's all three pieces removed from the sculpture, ready for assembly:


At this point speed is of the essence. I reassemble the pieces as quickly as possible, as if I leave them for any time they will warp out of shape and not fit together well. I make holes along the edges of the pieces, lining them up with each other on either side of the seams. If the pieces are still a little damp I can make the holes with a bamboo skewer, if they've dried more thoroughly I'll need to use a drill.

Then I tie the pieces together using twist ties (I save these compulsively) and apply glue all along the seams:


I dry the cast on a wig stand or stuff it with wadded up newspaper to help it keep its shape. Then I fill in the seams and any thin spots with more Celluclay and let it dry again.

After I've gotten a sturdy shell on which to build, I begin to add texture and refine detail, both by adding back on with wet Celluclay or by carving with a Dremel. Here's the rabbit mask with the beginnings of hair texture, created by adding a thin layer of wet Celluclay and working it with a wooden clay tool:


Here's the mask hairier and more refined. The brown marks around the eyes are scorch marks from the Dremel.


Hairier and more refined still:


Then painted and finished! The Celluclay will need to be sealed before it is painted, as it will absorb humidity and warp like a son of a gun otherwise. I brush on a layer, inside and out, of slightly diluted Weldbond (a kind of waterproof PVA glue) to do this.


As you can see, in a positive cast, much of the original sculpture's surface detail (hair, wrinkles, etc) is lost and needs to be added back in. How much detail is lost depends on the material used- a lot with Celluclay, but less with leather and other types of paper mache. In a negative cast, surface detail is preserved by the mold. This is the major reason why I use molds to reproduce most of my masks. However the fur texture on this mask is fun to create by hand, and I play with the original rabbit sculpture a little every time I make a new positive cast, mostly tweaking its fit. Positive casting also allows me to go more quickly from an original sculpture to a wearable mask, since there isn't the intermediary step of having the mold made. Plus, it's always good to have more than one tool in the tool box!
Sunday, October 04, 2009

New Cat Mask


Finally, a new cat mask in my Etsy store! I am extremely pleased with this mask. I used Titebond III Ultimate Wood Glue, a kind of waterproof wood glue, for the first time when I cast this mask. I had bought cases of Weldbond Outdoor Wood Glue which much to my displeasure went bad in storage, so I had to run out to the hardware store to try whatever outdoor wood glue they might have on hand- and it might have turned out to be a very fortunate thing! The Titebond is very, very thin and watery, which might seem like a disadvantage but... it was not necessary to mix it with any water to cast with it, so I got next to no warping. The three pieces of the mask dried fairly true to shape, all the seams went together well, and there was much less refinishing work than usual- hurrah!

So I believe my store is relatively well stocked for Halloween. Now I just need to decide what I'm going to be when I go out trick or treating!

Thursday, April 23, 2009

Revisiting Celluclay with Isabelle


First of all, I just have to get it out of my system... isn't Isabelle cute? She's so much bigger than the last time I posted her pics here.

Anyway. Isabelle has been coveting the new "Scrutinizing Eyes II" masks and has asked me repeatedly for one to paint. They take so long to make I hesitated to give her one, but then I figured it might be a good opportunity to try out some new casting methods I'd been thinking of. So for the first time in about eight years I cast masks with Celluclay, a commercial paper mache pulp.

Celluclay has one significant advantage of traditional glue and paper strip paper mache- it is about a thousand times quicker and easier to use. The glue and paper strip "Scrutinizing Eyes II" masks take 9 to 10 hours to cast and finish, but similar Celluclay masks takes about 3 to 4 hours to cast and finish. Theoretically, anyway, assuming the process results in a viable mask. Which in the past it hasn't.

There's been a number of reasons. First of all, I believed that Celluclay warps more easily than other kinds of paper mache. Now I'm not so sure that's true. Yes, some of the early masks I made with it did warp, but I've since learned things that could have prevented this. Such as, a paper mache mask that is not sealed properly will warp no matter what, and acrylic gesso does not seal anything, while Sculpt and Coat or diluted Weldbond PVA glue does. I've also learned that the shape of a mask will influence how it warps just as much as the materials it's made from, and some shapes just require special handling. (For more about this, see this post here: http://sanssoucistudios.blogspot.com/2007/06/mask-shape-and-warpage.html )

Another issue has been Celluclay's apparent inability to adhere to my detail coat of choice, a mixture made from Weldbond, Polyfilla and cheesecloth. (For more about my detail coats, see this post here: http://sanssoucistudios.blogspot.com/2007/04/yet-more-materials-experiments.html) But then came the big "duh" moment.. I was using actual glue- Weldbond, a kind of Elmer's on steroids- to adhere the paper strips to my detail coat, while I was relying on the dried powdered glue in the Celluclay mix to do the same job. I was comparing apples to oranges! What would happen if I used real glue?

So I cast two test masks. First I cast my detail coat into the mold and let it dry thoroughly. Then I thinned Weldbond with just enough water to make it mixable and added it to Celluclay, which I then used to fill the mold. Then I set it aside to dry, and waited, and waited. Then I remembered that Celluclay packed in thick layers in a rubber mold will NEVER dry. I put the mold under a fan and waited several days, and even then it only dried on the surface. When I finally demolded it, some of the surface of the mask stuck to the mold and pulled off. Paper mache generally doesn't stick to rubber molds, but it sure as heck will stick to a rubber mold better than it will to water! The damage was repairable, but it was still a hassle. Best to be avoided.

So for the next mask, I tried applying a layer of Weldbond over the detail coat, adding a THIN layer of Celluclay over that, letting it dry, and repeating this process about three times. I did not mix the Celluclay with anything other than water, as I didn't think I could handle the thin layers if they were too sticky. The mask dried fine in the mold, and none of it stuck to the rubber, but I did get a curious slight wrinkling effect on the surface. I suspect the Celluclay pulled at the detail coat and wrinkled it up as it dried. I haven't quite figured out what I'm going to do about this yet, if I'm going to worry about it at all- it is fairly subtle, and I suspect I could sand a lot of it out if I were motivated.

So in the end the Celluclay did not warp any more than the paper strips did, and ultimately it did adhere well to the detail coat. The biggest downside of Celluclay that I now see is its weight. A Scrutinizing Eyes II mask made with paper strips weighs only one ounce, while a similar Celluclay mask weighs three. Just for comparison's sake, a fairly normal pair of prescription glasses weighs one ounce, while the great big huge honking Coke bottle pair you will never catch me wearing on this blog weighs two. Still, it's possible for certain well-balanced, helmet-type masks that are inclined to stay on of their own accord anyway, that the Celluclay could work quite well.

So the moral of the story is that Celluclay is once again a possibility. Stay tuned!

Wednesday, February 13, 2008

Mask Hairing Demonstration


While I was getting this cutie ready for eBay, it occured to me I could snap some pictures and give a demonstration of my current method for hairing a mask. (This mask is available at auction on eBay until March 15, cheap because it's a materials test and too heavy to wear.)


Equipment and materials needed: Wefted and perhaps bulk Kanekalon hair in choice of colors; glue (I use a tacky white craft glue, others I've spoken to prefer hot glue); cotton swabs; wax paper; sharp scissors, a pencil, and a small container of water.


More on hair. I can imagine people out there scratching their heads and going, "wefted??" Essentially that means the hair is sewn onto long strips, which makes it much, much easier to apply. I've purchased just about all of my hair from African-American beauty supply shops, where it is sold as 'hair extensions'. I use the bulk hair for areas where I don't want the weft to show, ie, at and near hairlines, although I also use hair that has been cut from the weft on another mask during a bang trim or such. So far I have only found this hair to be available wholesale, so a wholesaler's number is needed to purchase it. However it is possible to buy repackaged (?) bulk hair for a somewhat greater cost from www.monstermakers.com.

So essentially I divide areas to hair into three parts: the back of the mask, where I can use the wefted hair; an area roughly 2 or 3 inches away from the hairline where I will glue loose hair; and any actual hairline itself, for which I will construct a little 'hairpiece'.


Here we see the mask looking something like a tonsured monk, with about half the wefted hair applied. Applying wefted hair is easy peasy. First I cut the weft to appropriate lengths. Then starting at the back of the mask and working forward, I apply a bead of glue to the weft and apply it in rows approximately 1 - 1 1/2 inches apart. Sometimes I'll need the hold the ends of the weft down for a few minutes until the glue starts to set, or worse comes to worst I'll reglue the ends down after the rest of it has dried.


In this picture I have applied all the wefted hair and am now gluing on loose hair. To hide the weft, which is convenient but rather ugly, I switch from the wefted hair to the loose hair about three inches or so from the hairline. I apply a bead of glue to the mask, and then I pick up small (about 1 inch wide) and thin handfuls of hair, trim the edge square with a sharp pair of scissors, and lay it down into the glue. Then I press it down using a damp cotton swab. When the swab starts getting too gluey and the hair starts sticking to it instead of to the mask, I throw it away and get another. It helps to have a small container of water and a big pile of swabs nearby before starting this task.

I am more likely to err on the side of making the handfuls of hair too thick instead of too thin. Too thick, and most of the hair will not stick in the glue, it will just come loose and make a mess. It is almost impossible to err on the side of making the handfuls too thin.

I make the rows closer together with the loose hair than I do with the wefted hair, about 1/2" apart. The loose hair has to be applied more thinly, so the rows need to be placed more closely together to cover adequately.


Above are a series of pics showing the creation of a hairline. I usually do this part first, before I do anything else with the hair on a mask, so that the pieces have time to dry and will be ready by the time I need them.

(First pic.) I trace the hairline with a pencil on a piece of wax paper, lay down a line of glue, and then press loose hair into the glue using a damp cotton swab. Again, if the swab starts to get too sticky, and the hair wants to stick to it instead of the glue, I throw it out and start with another. I let this dry until the glue is clear (usually overnight) and then (second pic) trim along the pencil line. After this I (third pic) very carefully peel the finished hairpiece from the wax paper, and (fourth pic) glue it in place.


Above is a pic of the nearly finished hairline in the front of the mask as well.

After the glue has dried overnight, I comb out the loose hair (there is always a lot of loose hair, don't worry too much about any shedding at this point) and then trim and style if I so desire. I put any big hanks of trimmed hair in a ziplock baggie to save for future hairing projects, and then to tone down any shininess, I color over the dried glue on the hairline with acrylic paint or a matching Sharpie.

There it is! Any questions, please feel free to drop me a note at info@sanssoucistudios.com!

Friday, April 06, 2007

Yet More Materials Experiments


I continue to cast dozens of "eyeball" masks using variations on the good ol' fashioned paper strip and glue method of papier mache. (I'm up to my eyeballs in eyeballs..) I have come to the conclusion that this is simply the lightest, strongest method there is. Forget paper pulp and those fancy schmancy modern casting resins. Not to mention there's a certain kind of alchemy in the transformation of plain paper, something we take so much for granted, into a work of art.

However, this is still a more labor intensive method than most, and in an effort to save time and keep my prices down I have been experimenting with different materials for the detail coat, the initial layer which picks up detail directly from the mold. I'm hoping to get a mask that needs very little touch up, to save time on sanding, filling, repairing blemishes, etc etc.

Specifically, I have been experimenting with the following detail coats: 1) the chiesatine/cotton fluff method, as mentioned below; 2) thinned Polyfilla, reinforced after finishing with a brushed on layer of thinned Weldbond; and 3) a mixture of Polyfilla and Weldbond. I apply these into the mold and back them with a layer of cheescloth, glue and Polyfilla, and two or three layers of craft paper strips and glue. These steps are pictured above.

After much hurling and smashing of masks on the ground I have come to the conclusion that all these materials are more or less equally strong, AS LONG AS THEY ARE KEPT AS THIN AS POSSIBLE. Anywhere they build up to any thickness becomes a weak point, paper strip backing or no. Given that, the material which is quickest and easiest to use becomes the most desireable. For whatever reason the Chiesatine method takes forever, and the straight Polyfilla is too prone to marring before it's coated with Weldbond, which leaves the Weldbond/Polyfilla mix as the current champion.

Briefly, how I make the detail coat.. I thin the Weldbond down to the consistency of cream, and then use it to mix the Polyfilla into a thin, lump free, brushable mix. I test it on the outside parts of the mold rubber until I'm sure it's a good texture. If it's too thick, it has a ridgy, meringue like texture which will make the applications of the other layers unnecessarily difficult. If it's too thin, it will run and pool in the deeper parts of the mold. The right thickness will have relatively little texture and will stick on the vertical surfaces of the mold without slumping or running. Again, this needs to be applied IN AS THIN A LAYER AS POSSIBLE. I don't worry if this layer is so thin that it's somewhat transparent and I can see the orange of the rubber mold through it! The subesquent layer of cheescloth, Polyfilla, and glue will fill in any thin spots nicely.

When I've done a few more masks and worked all the kinks out, I hope to post in more detail about the paper strip paper mache method. Until next time!

Tuesday, December 12, 2006

"Chiesatine" Paper Mache


This is my first attempt at "Chiesatine" paper mache, otherwise informally known as cotton-fluff paper mache, fresh and raw from the mold. I owe a huge thank-you to Mathieu Rene, a maskmaker based in Montreal, for emailing back and forth with me about how to do this. (His blogs: www.maskmaking.blogspot.com and www.creaturiste.blogspot.com.)

I have avoided trying the more traditional paper-strip-and-glue methods of paper mache as I didn't think they could pick up the fine detail (gumlines, wrinkles, etc) in my masks. I also felt they would probably be too time consuming for someone who already sinks 20+ hours into each mask. But then I was having trouble finding a material strong enough for the "eyeball" mask shown above- those fragile eyebrows would break as soon as I dropped the mask, no matter what it was made of- so I thought I would give this method a try.

I have to say, I am very, very, very, very impressed- and I mean VERY IMPRESSED- with how strong this mask is. Trimming it was next to impossible. As in, the Exacto knife couldn't touch it. As in, the Dremel could hardly touch it. As in, I had to keep turning up the motor speed, and changing the bits, and turning off the Dremel so that the mask could cool down and not catch fire, etc. Mathieu has told me that I didn't need to use as strong a glue as I did (Weldbond, a kind of white glue on steroids) so for my next attempt I'm going to try some version of Elmer's. But in any case, this mask can survive being dropped on the floor!

I am also very pleased with the detail in the cast. The fluff really did pick up all the little lines and edges quite well. The cast was also very true- no pinholes, blisters, cracks, etc, so unlike the Paperclay casts it required next to nothing in the way of repair. So while this method *was* quite time-consuming, I'm thinking it may take no more time than the Paperclay method, and it will yield a superior mask. I may even come out ahead since the materials are so incredibly cheap.

So very briefly, here's how I did this. First I applied a layer of absorbent cotton, purchased in a roll in a medical supply store, into the mold. I pressed it in firmly with a wet brush, removed as much water as I could with a sponge, and then painted in a layer of diluted glue. After that layer had dried, I applied a layer of cheesecloth, coated that with a layer of diluted glue, and then after THAT layer had dried I applied two layers of torn Kraft paper and coated those with the diluted glue.

I have yet to try this in a large multi-part mold. The big molds do sometimes seem to follow different laws of nature than the smaller ones. We'll see what happens!

Monday, November 20, 2006

Aves Products and Maskmaking


Well, I have concluded my experiments with Aves products and maskmaking, at least for the immediate future. As a last step, I turned over my Aves Paper Mache/Fixit Paste mask to my Materials Testing Department, aka my three year old daughter Isabelle, and it survived the experiment just fine. Un/fortunately, with all the collections of this that and the other in the house, Isabelle has learned to be very gentle with things so I may have to take a turn beating on the mask myself and see what happens.

I tried casting "Rip" masks in both unadulterated Fixit Paste and a combination of Fixit Paste and Aves Paper Mache. I've found that these masks come out to be about twice as heavy as the Paperclay/Sculpt and Coat masks, which with a mask the size of Rip is wearable but not at all comfortable. (The Paperclay masks come out to be about 8 oz, the Aves masks come out to be about 1 # 4 oz.) It's possible these materials might still have uses in smaller masks, where twice the weight may still not make a noticeable difference.

The Aves Paper Mache (and a similar product, Aves Clayshay) casts like an absolute dream, very easy to handle with no warping or shrinking, though the raw cast does have a lot of pinholes that need to be filled. Unfortunately the Paper Mache (and Clayshay) is much too fragile in the thicknesses required from maskmaking and unless it is reinforced with another material, falls completely apart during demolding. The Aves Fixit Paste is much stronger, but is more difficult to use, having the resemblance that it does to taffy left in a rear windsheild on a summer day. It also does not adhere well to vertical surfaces in a rubber mold, so it pools in the bottom, making for a cast very uneven in thickness. It can be cast over an initial coat of Paper Mache, which helps with this issue somewhat. In my experiments it tended to have fewer pinholes than the Paper Mache, but the ones it has are much more difficult to fix, since the Fixit Putty used to fill them is trickier to handle.

I also tried Aves Apoxie Paste, which is a little cheaper and adheres better to vertical surfaces. When dry, however, it has an unfortunate resemblance to dried snot, not at all what I want my masks to feel like! It's interesting, I hadn't thought of disqualifying a material because of the way it's *felt* before.

Oh well. I was hoping that the decreased casting time for these materials might translate into fewer production hours per mask, and thus lower prices. Since it is very important to me for my masks to be comfortable to wear, however, I think the extra weight disqualifies these materials from extensive usage on my part.

Wednesday, November 01, 2006

Paperclay/Sculpt and Coat Slipcasting


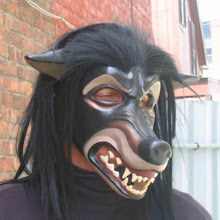
Well, here is the most current method of casting masks at Sans Souci Studios. In general it yields good results. The top pic shows the occasional mess up. This mask is too warped and wrinkled to bother finishing. The bottom pic shows a better than usual cast, nearly perfect, with just some blisters on one side of the muzzle and some missing tooth tips to repair.

So here's what I do. First I make a slip out of Paperclay. (Paperclay used to come in a prepackaged slip form, but it's been discontinued. I never got to try it.) I cut the Paperclay up into 1/2" cubes, place it in a plastic container, pour some water over it, squish it up with my fingers or mash it with a potato masher and then let it sit overnight. If the slip is still too thick the next day I add some more water and repeat the process. Sometimes it takes a few days to get the Paperclay a consistency I like.

I find it useful to have Paperclay slip of several consistencies handy. A slip the consistency of pancake batter is best for the first few layers of a cast, since it sticks to vertical surfaces and captures detail well. A slip the consistency of mashed potatoes is best for the subsequent layers of a cast, since it allows thickness to be built up more quickly. It is also useful for filling in big holes and divots in a finished cast. A slip the consistency of heavy cream, applied with a paintbrush, is good for filling in tiny airholes in a finished cast.

Paperclay slip stays fresh nearly indefinitely, as long as it's kept in a sealed container. Why? I don't think I want to know.

In case you're wondering, I use polyurethane rubber molds with plaster mother molds. I do believe slipcasting is *usually* done in plaster molds, so I thought I should mention this!

I don't use any release in the mold whatsoever when I slipcast with Paperclay, I want that stuff to stick! I've gotten some pretty lumpy, wrinkled casts out of molds that have been treated with release, as the pic above shows. It's helpful to wash the living daylights out of these molds- plain old dishsoap works well.

I apply a first layer of the pancake batter slip with a chip brush, dabbing it along the upper edges of the mask and letting it run down into the lower parts. The thinner this first layer is, the better- it really only needs to coat the rubber so that the rubber appears to change color. Any pooled excess can be carefully scooped out with a spoon. When this layer is dry I brush a coat of Sculpt and Coat over it. I resist the urge to fill in any cracks or separations in the Paperclay with more Paperclay until the Sculpt and Coat is dry, as re-wetting it can also cause it to wrinkle and deform.

I apply one or two more layers in this manner (pancake batter slip, followed by a coat of Sculpt and Coat) and then I switch to the mashed potato slip. I apply a layer about 1/8" -1/4" thick, let it dry, and then coat it with Sculpt and Coat, again resisting the urge to fill any cracks or separations with Paperclay until the Sculpt and Coat is dry. And believe me, it takes some resisting, as the cracks are large and plentiful at this stage!

Then, using more mashed potato slip, I build up additional thickness around the edges and other vulnerable parts of the mask, finally fill in the cracks and separations, and apply another coat of Sculpt and Coat. Some of the very deep cracks may require more than one application of slip and Sculpt and Coat. Once everything feels dry I remove the cast from the mold, being careful about parts such as noses and eartips that may have some hidden dampness.

This method of casting is susceptible to hidden air pockets in between layers of Paperclay, especially along the edges of raised areas such as eyebrows, noses, etc. These areas can be very weak and can cave in if the mask is dropped, etc. I check for these by pressing along suspect areas with my fingers, trying to cave them in myself, and filling in any resulting dimples with more mashed potato slip.

Then I clean and repair the cast. I clean edges and seams with an exacto knife, or a dremel if necessary. I resculpt anything that needs resculpting- lost wrinkles, lips, eartips, etc with Paperclay straight from the package. I hold the mask up to a strong light to find any thin spots, which I fill from the inside with the mashed potato slip. I fill divots with more slip and smooth them out with a wet elephant ear sponge. I let everything dry, sand down the outside of the mask (220 grit is usually sufficient, tho 100 grit can be useful for very stubborn lumps and wrinkles) and repeat the process as necessary. Once the mask is the way I want it, I apply a final coat of Sculpt or Coat, inside and outside.

I wipe off the outside of the mask with a damp paper towel to get off any dust before I put Sculpt and Coat on it, as otherwise it can ball up and make lumps in the finish. I brush it on, and then wearing rubber gloves, I smooth it down with slightly dampened fingers. Since the Sculpt and Coat dries very quickly, I apply it to smallish areas (about 2" by 2") and smooth as I go.

I have also experimented with using an initial detail coat of Sculpt and Coat, and my results are mixed. I've gotten some gorgeous casts, but when I get casts with the usual holes, divots, etc I have the extra step of cutting away the dried Sculpt and Coat from the edges in order to repair them. If you do want to try this, just apply the Sculpt and Coat thinly. If it's applied in big thick pools the top will dry but the bottom won't, since the top will have sealed the bottom away from the air.