I continue to cast dozens of "eyeball" masks using variations on the good ol' fashioned paper strip and glue method of papier mache. (I'm up to my eyeballs in eyeballs..) I have come to the conclusion that this is simply the lightest, strongest method there is. Forget paper pulp and those fancy schmancy modern casting resins. Not to mention there's a certain kind of alchemy in the transformation of plain paper, something we take so much for granted, into a work of art.
However, this is still a more labor intensive method than most, and in an effort to save time and keep my prices down I have been experimenting with different materials for the detail coat, the initial layer which picks up detail directly from the mold. I'm hoping to get a mask that needs very little touch up, to save time on sanding, filling, repairing blemishes, etc etc.
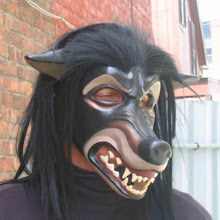
Specifically, I have been experimenting with the following detail coats: 1) the chiesatine/cotton fluff method, as mentioned below; 2) thinned Polyfilla, reinforced after finishing with a brushed on layer of thinned Weldbond; and 3) a mixture of Polyfilla and Weldbond. I apply these into the mold and back them with a layer of cheescloth, glue and Polyfilla, and two or three layers of craft paper strips and glue. These steps are pictured above.
After much hurling and smashing of masks on the ground I have come to the conclusion that all these materials are more or less equally strong, AS LONG AS THEY ARE KEPT AS THIN AS POSSIBLE. Anywhere they build up to any thickness becomes a weak point, paper strip backing or no. Given that, the material which is quickest and easiest to use becomes the most desireable. For whatever reason the Chiesatine method takes forever, and the straight Polyfilla is too prone to marring before it's coated with Weldbond, which leaves the Weldbond/Polyfilla mix as the current champion.
Briefly, how I make the detail coat.. I thin the Weldbond down to the consistency of cream, and then use it to mix the Polyfilla into a thin, lump free, brushable mix. I test it on the outside parts of the mold rubber until I'm sure it's a good texture. If it's too thick, it has a ridgy, meringue like texture which will make the applications of the other layers unnecessarily difficult. If it's too thin, it will run and pool in the deeper parts of the mold. The right thickness will have relatively little texture and will stick on the vertical surfaces of the mold without slumping or running. Again, this needs to be applied IN AS THIN A LAYER AS POSSIBLE. I don't worry if this layer is so thin that it's somewhat transparent and I can see the orange of the rubber mold through it! The subesquent layer of cheescloth, Polyfilla, and glue will fill in any thin spots nicely.
When I've done a few more masks and worked all the kinks out, I hope to post in more detail about the paper strip paper mache method. Until next time!